Best Dairy-Free Waffles
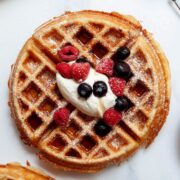
Best homemade dairy-free waffles that are light and fluffy with crispy, golden edges. Top with fresh fruit and maple syrup for the ultimate breakfast or brunch! They're freezer-friendly.
Ingredients
- 1 ¾ cups all-purpose flour, spooned & leveled
- 1 tbsp granulated sugar
- 1 tbsp baking powder, (yes 1 Tablespoon!)
- ¼ tsp salt
- 2 large eggs
- 1 ⅔ cups oat milk or almond milk
- 6 tbsp melted vegan butter or coconut oil
- 1 ¼ tsp vanilla extract
Instructions
- In a large mixing bowl, whisk together the flour, sugar, baking powder, and salt.
- In another bowl, whisk the eggs, then mix in the oat milk, melted vegan butter, and vanilla.
- Add the wet ingredients to the flour mixture, and whisk gently until a batter is formed, some small lumps are OK! Do not over-mix – it will make the waffles tough. Add 1 – 3 Tablespoons more of oat milk if the batter is too thick.
- Heat a waffle iron (or a mini waffle maker) and lightly grease it with non-stick spray or vegan butter. Once hot, spoon batter into the iron. Close the waffle iron a cook until golden brown and the center is cooked through. Tip: The amount of batter and cook time depends on the size and strength of your waffle iron. For best results, follow the time recommended by your waffle maker.
- Repeat until you’ve used all your batter.
- Let waffles sit for 1 – 2 minutes before serving warm with toppings of your choice – I love extra banana slices, fresh fruit, and whipped cream!
Notes
Avoid overmixing the batter. This is my #1 tip for waffles. Use a rubber spatula to gently fold the dry ingredients into the wet ones. Overmixing will result in dense and tough waffles.
Stay away from margarine spread. It’s not the same as vegan “baking” butter and will give these waffles a weird flavor. Do not use “I Can’t Believe It’s Not Butter” spread!
What to Serve with Waffles: Read the blog post about, I left 20+ ideas.
Flour: You can use cake flour, pastry flour, white whole wheat, or whole wheat flour. Be aware that whole wheat flour will change the taste of the waffles.
Gluen-free: to make these waffles gluten-free, use this gluten-free 1:1 baking flour. Do not use almond flour, coconut flour, or oat flour.
Storing: If you have leftovers, store the dairy-free waffles in an airtight container in the fridge for up to 4 days.
Freezing: You can freeze leftover waffles. Let them cool to room temperature, then wrap them in plastic wrap and place them into a freezer-safe bag. You can freeze waffles for up to 3 months. When you are ready to enjoy one, place a frozen waffle on a microwave-safe plate and microwave for 30 – 60 seconds until warm. You can also reheat in the air fryer or oven at 275°F for 5 – 7 minutes until warm.
Reheating: For best results, reheat them in the microwave for 30 – 90 seconds until warm, in the fryer at 275°F for 5 minutes, or in the toaster oven at 275°F for 5 – 10 minutes. You can also reheat them in the toaster.
Nutrition
Calories: 294kcal | Carbohydrates: 31g | Protein: 7g | Fat: 15g | Saturated Fat: 9g | Cholesterol: 62mg | Sodium: 424mg | Potassium: 64mg | Fiber: 1g | Sugar: 2g | Vitamin A: 90IU | Calcium: 216mg | Iron: 2mg
DID YOU MAKE THIS RECIPE?Please leave a comment and star rating on this post and tag @HealthfulBlondie on Instagram & hashtag it #healthfulblondie!